
// eye, face and respiratory protection
Choosing a welding helmet—and when PAPR matters.
A comfortable helmet with the right controls gets used properly. This guide separates optical features from fume protection, shows which specifications change the working experience and flags the replacement parts to price before buying.
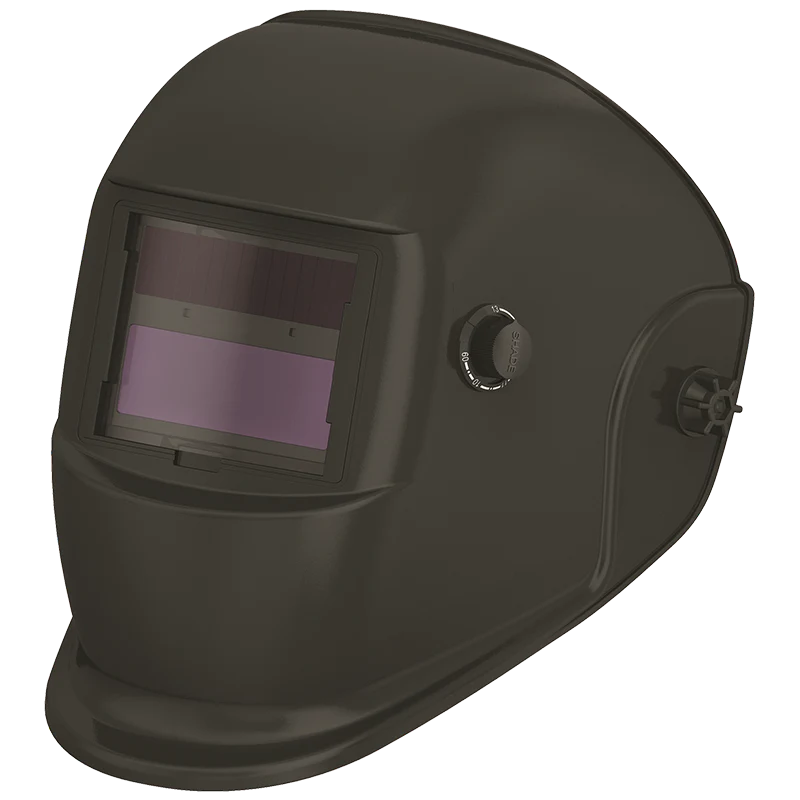
Start with the risk, not the helmet catalogue
A welding helmet protects against intense visible light, ultraviolet and infrared radiation, plus sparks and spatter. It does not automatically control welding fume. The process, parent metal, coating, duration, work position and ventilation all affect the controls required.
The HSE hierarchy for welding fume starts with avoiding or reducing exposure, then local exhaust ventilation (LEV), followed by suitable respiratory protective equipment where exposure is not adequately controlled. A powered-air helmet can be part of that protection, but it is not a substitute for a proper assessment or effective extraction.
Auto-darkening shade range
Do not buy on maximum shade alone. Check the adjustable shade range covers the processes and current you actually use. Many general welding filters cover common MIG, TIG and MMA work; low-amperage TIG can demand reliable low-current sensing, while plasma cutting and grinding need suitable modes of their own.
Use the helmet manufacturer's process/current shade chart and the applicable workplace assessment. A shade that is too light is unsafe; a shade that is unnecessarily dark makes it harder to see the joint and maintain position.
Sensors, reaction and controls
- Arc sensors: more sensors can reduce the chance that the workpiece, torch or an awkward position blocks every sensor.
- Sensitivity: useful for low-current work and for stopping nearby arcs from triggering the lens unnecessarily.
- Delay: controls how quickly the lens returns to its light state after the arc stops. Longer delay can be more comfortable after a bright, high-current weld.
- Grinding mode: convenient only when its switch and warning state make accidental welding in grind mode unlikely.
- Controls: external controls are quick with gloves; internal controls are harder to knock. Choose the compromise that suits the work.
Optical class and viewing area
A larger viewing area improves awareness and helps in awkward positions, but it adds size, weight and replacement-lens cost. Optical-class markings describe clarity and consistency through the filter; compare the complete rating, not a marketing phrase. Try the helmet on if possible—balance and headgear adjustment often matter more over a full shift than a small increase in screen size.
Standard helmet or powered air?
| Standard auto-darkening helmet | PAPR welding system |
|---|---|
| Eye and face protection; light, simple and lower initial cost | Integrates a powered blower, filters, hose and suitable headtop as one system |
| Does not provide respiratory protection by itself | Can provide a stated assigned protection factor when correctly selected, used and maintained |
| Good choice where fume is adequately controlled separately | Often considered for longer-duration work or where the assessment requires powered RPE |
| Replacement lenses and batteries are the usual consumables | Also needs filters, pre-filters, batteries, seals and airflow checks |
HSE guidance says that for work up to an hour, suitable options may include an FFP3 disposable mask or half-mask with a P3 filter; for longer-duration work it points to battery-powered air-fed protective equipment with at least APF20. The actual choice must be suitable for the hazard and wearer. Tight-fitting masks require face-fit testing and a clean-shaven sealing area.
Check the consumables before the purchase price
A premium helmet becomes poor value if the correct outer and inner lenses, sweatbands or batteries are difficult to source. Before ordering, price and confirm availability of:
- outer and inner cover lenses for the exact model;
- headgear, sweatbands and face seals;
- for PAPR, main filters and pre-filters, battery and charger;
- any task-specific visor, hard-hat or hearing-protection compatibility.
A practical shortlist
- List the processes and current range.
- Complete the fume and task risk assessment.
- Choose the required eye/face and respiratory standards and protection level.
- Compare shade range, sensor performance, optical class and viewing area.
- Try the balance, headgear and controls with the gloves you use.
- Confirm consumable availability and ongoing filter/lens cost.
Compatibility matters. A helmet, respirator, hearing protection and other PPE must work together as a system. Follow the manufacturer's approved combinations; do not improvise connections or substitute unapproved filters and face seals.
Compare complete systems, not just screens
We stock helmets, powered-air systems and the replacement lenses and filters that keep them usable.
Keep reading
Compare MIG, TIG and MMA, then use our first MIG setup guide and workshop consumables checklist.